Sunday, August 25, 2013

We Should Cocoa - Caramels

This month's We Should Cocoa challenge is being hosted by Elizabeth's Kitchen Diary and Elizabeth has asked us to produce a 'chocolate', bon bon, candy call them what you may and the main restriction was that whatever we produced had to be consumable in no more than 3 bites! Well  3 bites is still a pretty sizeable morsel so not too restictive there.

I chose to make chocolate caramels as this is my confectionery grail, the one chocolate I so wish I could make reliably and without fear.


I have tried a few recipes over the last few christmases and I suspect it is not so much the recipe as the technique that is giving me problems. Keeping every grain of crystallised sugar out of the caramel and getting the temperature just right are all part of the precision that I struggle to achieve. This time I used a William Curley recipe for chocolate caramels from his book Couture Chocolate. This is a book well worth buying if you become a little obsessed by chocolate. It covers a range of chocolate creations, many of which are sold in his shops, and I particularly like his take on caramels which are never too sweet.

I cannot find any of his caramel recipes published on the web so I will link you to my favourite sea salt caramel recipe from David Lebovitz, which I have produced several times, and for a basic caramel it is my favourite: David Lebovitz salted butter caramels.

Here are some pictures of the dipping process which can be the make or break of the shelf life of the caramel. Any chinks in the chocolate coating and the caramel may start to cystalise, seep out and get up to all sorts of mischief.

The caramel would usually be poured into a frame or square pan to set and cool overnight. To make the dipping process easier a thin layer of untempered chocolate is spread over the top surface and then the caramel is cut into whatever shape you want. The thin chocolate layer is much easier to cut if the chocolate is untempered as it will set softer and ultimately it will be fully covered with tempered chocolate and be the base of the finshed bon bon so any cooca butter bloom will not show. This layer makes the bon bon easier to handle and less likely to stick to the dipping fork.


Drop the piece into the pool of tempered chocolate caramel side down and then using a dipping fork tip the piece over by pushing down on one edge.


Carefully flip the item over by pushing down one one side and then lift out of the pool of chocolate.


The coating later is now on the bottom and will be a firm base on which to lift the piece out on the fork. Try to tap off any excess chocolate before transfering the piece carefully to a sheet of waxed paper onto a cellophane sheet. Try to ease the chocolate off gently making as little an impression into the chocolate coating as you do so. It is often around the forks marks that the coating is dented and this is a weakness where the caramel may try to seep through.


At this point the chocolate will be too liquid still to mark a pattern so move on to the next piece to dip but once this is deposited onto the tray, go back to the last piece, and using the fork to gently plunge and lift across on the top surface mark as good a pattern as you can. Mine are totally random but heck it all tastes the same.
Remember to keep stirring your pool of chocolate to keep the temperature even, and for plain chocolate you are trying to maintain 31 degrees centigrade.  You will most likely get some solidified chocolate around the edges of your bowl and try not to bring any solid pieces back into the pool. Better to gently melt these off with a hot air blower (hair drier). So long as the chocolate pool is not heated up more than  a couple of degrees it should stay in temper but you may need to let it cool down again and keep stirring to allow it to settle again.


The general advice is to only try and temper a minimum of 1 kg of chocolate and not much less. This means you will often be left with a large amount after you have dipped whatever you have prepared.  I quite like to use up the reservoir while it is still in temper and good plain biscuits make great dippers. I even had some caramel trimmings that I managed to sandwich between some rich tea fingers, Twix eat your heart out!


So this post is being submitted to the August 2013 We Sould Cocoa, a round up of which will be up for view by the end of the month. Link to the round up is here: Elizabeths Kitchen Diary and all the challenges in this series are here:  Chocolette Log Blog.


Tuesday, August 13, 2013

Plum Cake - Eats Well with Custard


I came home with some freshly picked plums today and have made them into a cake to take into work tomorrow. Well more accurately I will be taking in what I have not already eaten for supper tonight.

The plums seemed too small to be Victoria plums, and also not as sweet as I think a Victoria would be, but they looked very much like them. Nonetheless they have made a very nice 'plain cake'. I love that expression, 'plain cake', I think it was used a lot more when I was a child, less so now. I wonder if it was used to reflect more the cost of the ingredients, higher ratios of cheaper flour and sugar and less of the more expensive butter and eggs thus giving a plain cake as opposed to a 'fancy' one. 'Eats Well With', however, is a bit of a new phrase that I first associated with Gary Rhodes though he may not have invented it. I suspect it trashes all the grammar rules as well as sounding a bit odd, so language purists please forgive me this once.

The recipe for this cake is taken almost exactly from one that appeared on  Dom's blog Belleau Kitchen last year. Please head over to mum makes a victoria plum cake to get the full recipe. My only change was to add yogurt instead of milk to the cake mix and to sprinkle the top with flaked almonds, oh, and to use a square tin.
 

I have quite a passion for custard, so many of my cakes and puddings are adorned with it and in this case it certainly suits the plain cake theme. Most of the time I will use a tin of cold bought custard. You may be feeling rather horrified at this point but custard lovers the world over will understand the attraction. Custard is nearly always instead of cream in my bowl. Ice-cream comes next as it is really just frozen custard after all, and then yogurt and then cream. Unless it is christmas pudding and then it has to be rum sauce (never rum butter). Dwelling on custard as I am, can anyone explain to me why those pots of 'fresh' custard from supermarkets have so much (too much) cream in them?

So here is the whole beauty, and unless I get the mega munchies later there should be plenty for folks at work.


Thursday, July 25, 2013

We Should Cocoa Challenge #35 - Ice-Cream


This month the We Should Cocoa challenge has us combining chocolate with ice-cream, and with the glorious weather we have had this month it is a very apt choice of guest ingredient. 

I knew straight away I would not be making my own ice-cream as I have yet to make a home-made ice-cream that I thought was worth the effort compared with some of the very good ones that can readily be bought from most supermarkets and stores.

So the question was what dish to choose that combined a bought ice-cream with chocolate other than one of the many ice-cream sundae variations. Well I found my answer while browsing through a recently purchased Mary Berry cookbook, 'Desserts'. The recipe that jumped out was 'Italian Tartufo'.

Now do not let the effortless looking perfection of the recipe book picture deceive you, these, like so many other too simple to be true recipes  will have you swearing like a trooper as you struggle to reproduce something remotely like the picture. But that said it was fun and the fact that mine were wonky and covered in very thick chocolate coating rather than the beautiful thin shell of the recipe really was not a problem. It might have helped if I possessed the large ice-cream scoop referred to in the recipe but I do not so a bit of make do was called for.

You start by soaking some amaretti biscuits in an almond or orange liqueur.


That is the easy bit over with. 

You then have to encase each amaretti biscuit in a 'ball' of ice-cream.
The ice-cream is put in the fridge to soften a little before taking a large scoop and pushing an ameretti biscuit into the centre. Maybe I had used too much liqueur in the soaking or my biscuits were substandard but the 'soaked' biscuit crushed down under the slightest pressure so little chance of pushing it into the ice-cream.

Once the ice-cream bombe is sorted this goes back into the freezer to harden up while you melt down the chocolate along with some butter and golden syrup to create a softer setting shell than you would get with pure chocolate.

I decided to make some chocolate disc bases on which to sit the 'bombes' while the chocolate coat was being added to the top.


Now it was impossible to do the next stage and take a photo at the same time but as best you can you coat the bombes with a thin layer of the melted and cooled chocolate and then quickly get them back into the freezer to set up. If you work quick enough you might be able to get the chopped nut garnish on while the chocolate is still slightly soft but I took too long trying to patch up the holes in my coating and had to just add the nuts as best I could at the end.


So after about an hour back in the freezer they were hard enough to served! The flavour combination was really good and as I was just making dessert for two it was not so much trouble if a bit messy.


The 'We Should Cocoa' challenges are hosted by Choclette of Chocolate Log Blog, and Chele over at Chocolate Teapot. You will find a list of the previous challenges on Choclette's blog.

Tuesday, June 25, 2013

Random Recipes #29 - Healthy & Happy

For this month's Random Recipe Challenge Dom of Belleau Kitchen has us focussed on summer dishes that make you feel healthy and happy. Dom's own random contribution was a prune and almond brownie and as I am a big fan of prunes, almonds and chocolate I know that is one dish that would make me very happy.

To make the random selection I chose 4 books from my collection that I knew either had sections that met the criteria or were all very much feel good summer type recipes. The books I chose were: Sally Clarke's Book, A Mediterranean Harvest by Paola Scaravelli and Jon Cohen, The Cook and the Gardener by Amanda Hesser and For the Love of Food, Vegetarian Recipes from the Heart by Dennis Cotter. From these four the Dennis Cotter was randomly selected by my other half and then excel kindly whirled out a page number for me within the 'Salads' section and the recipe was 'Minted Bean Salad with cumin crispbread'


I have never been to Ireland but if I did the cafeparadiso restaurant Dennis Cotter runs in Cork would be high up my list of places to eat at. I am not a vegetarian but his recipies are quite inspirational. They often require quite a few ingredients and may well need a bit of planning ahead but I have never been disappointed with anything I have made from his books.

This recipe was quite a simple one. I made a couple of substitutions by swapping chick peas for the dried haricot beans and using lebanese flat breads instead of european bread for the cumin crispbreads.

The lightly cooked green beans are mixed with the cooked dried beans and a dressing is made by lightly cooking a couple of chopped shallots and garlic cloves in a little olive oil. After a couple of minutes of cooking the mint (a handful or however much you like) and a splash of vinegar are added and the dressing is cooked for a few seconds more.

Then add the two sorts of beans to the pan and stir around briefly to warm through. It was a cold and blustery June evening so warm salads were more appealing than fridge cold ones.

The cumin crispbread was made by sprinkling olive oil and cumin seeds onto the flatbreads before baking briefly in a moderate oven until crisp.  They tasted pretty good but all the cumin seeds dropped off as soon as I tried to snap them into pieces!


Tuesday, June 11, 2013

We Should Cocoa Challenge: Mint


A 'skinny' truffle for June's We Should Cocoa Challenge


Garden Mint Truffle
From 'Adventures with Chocolate', Paul A Young
 
 
If you who have been around reading my chocolate posts before you will have noticed I am rather fond of the recipes from Paul A Young's book 'Adventures with Chocolate', so no surprise that I turned to it again for the 'mint' challenge. This month's challenge host is 'a kick at the pantry door',
 
 I was in two minds about this challenge as I am really not very fond of mint and chocolate together and I am sad to say it is still in my 'not bothered' list but this is none the less a simple and clean tasting truffle recipe.
  
I have referred it as a skinny truffle as there is no cream or additional fat added, just a mint infused syrup that is poured whilst hot onto the chopped chocolate and then whisked to a truffle texture.
 
I halved the recipe as I was very unsure of liking it and that was a good move.
 
  • Make a syrup from 50g of sugar and 150ml of water, boiling the sugar to fully dissolve, then add 18g fresh mint leaves to the syrup and simmer for 3 minutes.
  • Leave the syrup to cool and further infuse with the mint.
  • Chop 175g of a 64% plain chocolate.
  • Strain the mint leaves out of the syrup and bring the syrup back to a simmer.
  • Pour the hot syrup over the chopped chocolate and stir/whisk well to create the smooth truffle texture.
  • Allow to cool/set and then scoop into small truffle balls with something like a melon baller or suitable teaspoon.
  • Roll the balls in your hands to get a smooth surface and chill a little to firm up.
  • Melt some more dark chocolate in a shallow bowl and place cocoa powder in another shallow bowl. Temper the chocolate if you wish but the cocoa dusting will hide any whitish cocoa butter imperfections.
  • Quickly drop each ball into the melted chocolate and then into the cocoa powder. This bit is messy and I would say use whatever tools you like to move the balls into and out of each bowl. Fingers work but only use one hand in the melted chocolate or you will get completed glued up yourself. Roll each ball around gently to cover with the chocolate and then the cocoa powder and then leave a moment or two to set before attempting to lift the ball out of the cocoa and onto a tray.
 
Water based ganache truffles are best eaten very fresh as the flavours seem to dull far more rapidly than with a cream or butter ganache.
 
The 'We Should Cocoa' challenges are hosted by Choclette of Chocolate Log Blog, and Chele over at Chocolate Teapot. You will find a list of the previous challenges on Choclette's blog.


Thursday, April 25, 2013

We Should Cocoa Challenge: Honey

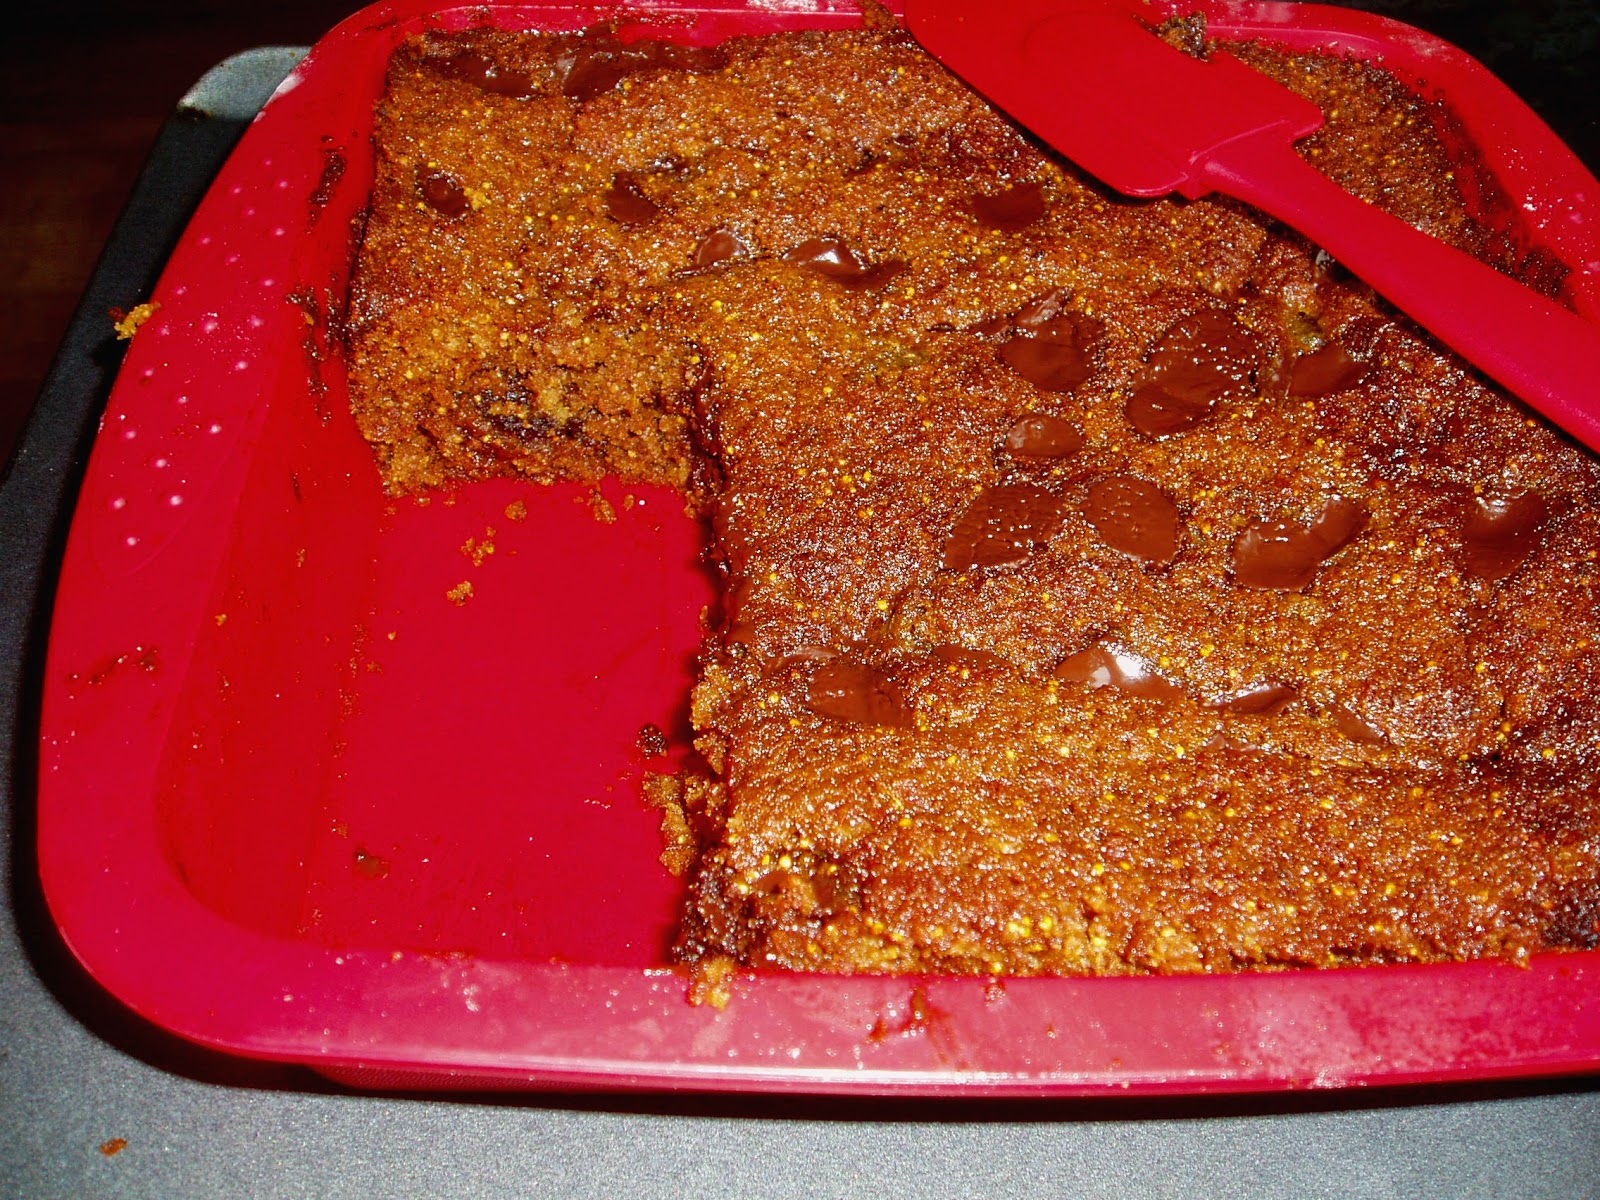
This month's We Should Cocoa challenge is to combine the magic of honey with wonderful chocolate. I had found a few recipes where there was a token amount of honey in an otherwise chocolate centred recipe but I really felt the honey should be centre stage for this challenge. So after much flicking of cook book pages and fruitless googling I  finally came across a recipe that not only had a generous measure of honey but very conveniently used up some of my cupboard lurkers as well. So  here is a boozy honey, fig, and chocolate cake. 


For this recipe I was able to bring out a very satisfying number of ingredients from the back of the cupboards. The bargain bucket of honey, rather old dried figs, some ancient sweet red vermouth, spelt flour, spices, dark chocolate buttons and some butter and an egg.

The cake is based on a recipe from Leon, Baking and Puddings by Claire Ptak and Henry Dimbleby.


The original recipe does not have any chocolate in but I love chocolate with both figs and red wine so a handful of chocolate buttons seemed an appropriate deviation.


My silicone pan was not quite large enough so this resulted in a rather messy looking finish but this is how to it went:

375g of chopped dried figs were soaked in 350 ml of red vermouth for a couple of hours. This soaking step is not part of the original recipe but my figs were quite old and much drier than when I bought them, so it seemed a good idea.

The fig and wine mixture was then brought to a boil with 1.5 tsps cinnamon and 0.25tsp ground clove.

The pan is removed from the heat and allowed to cool for ten minutes before adding 125g butter and 250g honey, stirring well to melt and incorporate all together.

Then after another cooling period of 10 minutes you stir in one beaten egg.

In a separate bowl weigh out 200g spelt flour with 1.5tsp baking powder and 1tsp baking soda.

Pour the fig mixture over this and stir to combine adding a handful of chocolate buttons with the last few stirrings.

Pour into a 20cm square lined tin or silicone pan, sprinkle with a few more chocolate buttons and bake at 160C for about 45mins or until firm to touch in the centre.

Now you should allow the cake to cool in the tin but I was too impatient and you can probably see the chocolate is still melted in this photo but it was cake o'clock, no time to wait.


So this is my submission for the April We Should Cocoa challenge run by Choclette and Chele


Tuesday, April 16, 2013

A New Personal Best with thanks to 'Flour, Water, Salt, Yeast, by Ken Forkish

This loaf is I believe my best home baked loaf of bread yet; and I have been making a mess in the kitchen for quite some years, believing that one day I will discover the alchemy of good bread.
 
Well I just took a very proud step in that direction with the help of a new book by Ken Forkish, titled Flour, Water, Salt, Yeast; The Fundamentals of Artisan Bread and Pizza. The book recently won the Baking section of the IACP 2013 awards and based on my first loaf I would have given it the award too.

There are a lot of explanations at the beginning of the book and quite a bit of the background to how Ken Forkish took a complete career change to become an artisan baker. For the first time in memory I read the full introductions and notes before I started baking. A number of the techniques were not new to me now, but they would have seemed quite alternative several years ago.

The dough is kept very hydrated with a typical flour to water ration of 10:7.2. The dough is treated to a number of folds/turns during the bulk proving stage and the fermentation times are long with formulas that use minimal amounts of yeast. Time is treated as an ingredient whereby slow fermentation results in significantly greater flavour development.

The part where I found myself on totally fresh ground was in the baking. The book has you shaping boules of dough which are proved and then baked inside a dutch oven/cast iron pan with the lid on. 

With this first recipe I had been a bit impatient and shaped some of the dough into small rolls to get a small batch of dough baked off earlier. The rolls were fine in terms of flavour and were ok in texture but nothing remarkable. It was when I baked the boule things really took off.  All this magic, however, is taking place inside the pot, completely out of sight, so it was not until I dared take the lid off the pot that I knew the loaf had transformed itself as it baked. The rise, or oven spring, to give it a baker's term was way better than any bake I had managed in this oven before. As the loaf finished baking with the lid now removed from the pot, the colour of the crust turned a very healthy golden colour.

On cutting the loaf I was delighted to see a beautiful thin but crisp crust had developed, and the flavour was really very good. All this from the most simple recipe in the book, the Saturday loaf, which can be started in the morning and ready and on the table for your evening meal the same day.

 
Here is a picture of this loaf as shown in the book from which you can see I did not get the very open texture to the crumb and my crust was a much lighter colour, but not a bad comparison for a first go.
 
I am planning on giving this loaf another try in a few days and certainly want to repeat it before I move on to some of the more traditional recipes that use an overnight fermentation. I am also trying to build up a sourdough starter so I can eventually work my way through the whole book.
 
All the recipes in the book are for quite basic loaves, as the title suggest fundamentally just flour, water, salt, yeast. The pizza recipes also look very appealing and there is a section on working through the development of your own recipes.I wonder how much I would want to deviate mind as despite my love of fancy cakes I have always liked my bread to be simple, but perfect, so this book is just right for me.
 
A loaf of bread, some good butter and a glass of wine and I am very happy.